I can’t believe my little guy is starting preschool! It’s just a few hours a week, so I’m not sure that it “really” counts, but I’m also not sure that it doesn’t count either. Regardless, we are celebrating the first day of preschool with him! (PS Trying to think of a fun “first day of school” tradition we can start, any ideas?!)
In addition to all the normal little things I needed to get for the big day (backpack, water bottle, etc.), I wanted to get a special “first day of school” pennant for him to hold. I immediately started looking online, but couldn’t find anything that was exactly what I wanted. The more I looked, though, the more I thought I might be able to DIY one. With a DIY, you’re fully able to customize not only the text and font, but also the color to match first day outfits or uniforms and adding the special touch of ribbon makes it even more fun.
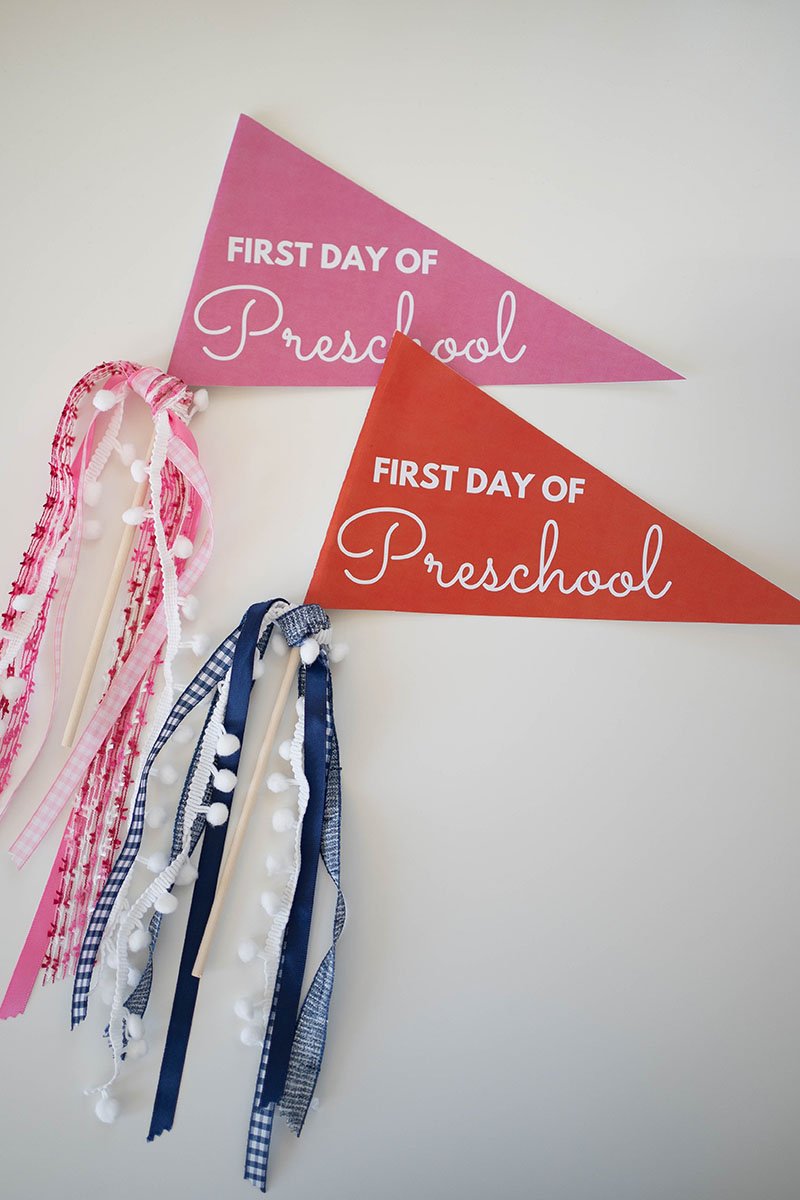
I loved it so much that I made one for Jack and his little friend who lives on our street and is going to the same preschool! (I cannot wait to get a picture of the two of them together on the first day!!!)
I have to admit, this is so easy…. I can barely call it a DIY, but wanted to share anyway with some of my tips!

THE SIGN:
I made a quick template in Canva. It is truly nothing special. I set the canvas to be the size of a sheet of paper, added a filled triangle, and then added white text. (There are also tons of fancier designs you can buy from Etsy to print from home yourself too!)
I had mine printed at Staples on heavier cardstock and picked it up the same day. Super easy. It’s not the highest quality print option, but for an at-home project, it works just fine! (I also think they’ll photograph nicely anyway.)

WHAT YOU NEED:
– Printed pennant
– Ribbon options*
– Scissors
* I liked mixing different kinds of ribbon for added texture and interest. What I used: Gingham, similar solid, tweed (in stores at Michaels), and pom pom.

Cut out the pennant carefully, as close to the printed edge as possible. (When in doubt, cut the color though so you don’t have any white edges.) Leave the white “tail” cutting it so you create a bit of a tag.

You can use a tool for scoring, or you can just free fold the tag back. The trick here is to fold a little sliver of the color to the back, so you’re left with a clean full color edge on front!

Using a hot glue gun, draw a line of glue in the crease, leaving a little bit of the edges clear so the glue doesn’t press out. Immediately place the dowel in the crease, ensuring that the dowel doesn’t stick out the top. Then add another line of glue on the far end of the tag and fold over, sandwiching the dowel in the middle.

Cut each ribbon to the desired length, carefully knot the ribbon around the dowel. You can add a dab of hot glue on the inside of the knot, on the back, to secure it if you’re worried about it slipping.
There you go!